Hi everybody, it's been a long time, I know, but the development of the Final Project
and summer vacations kept me away to update my blog.
Today's topic is Game Engines' final project. During Game Engines class we learnt how
to develop video games in XNA.
For the people who don't know what am I talking about, XNA is a great video game development
framework released by Microsoft and based on C# programming language.
Its main strengths are:
-
It grants the opportunity to develop video games for both MS Windows and MS Xbox 360.
-
It is based on C# (an Object Oriented programming language) and runs on a virtual
machine (no memory management as in C).
-
Microsoft's development community is huge and available to help newcomers.
For more information please visit the link below:
http://en.wikipedia.org/wiki/Microsoft_XNA
During the semester we had lessons and laboratories where we learnt:
-
C# basics
-
XNA basics
-
How to manage sprite animations
-
How to manage player inputs
-
How to develop simple physics algorithms, in order to develop our small engine
-
How to manage collisions between objects
-
How to manage cameras
-
How to manage sounds
-
How to create a small game menu
After a full immersion of C# programming, to be honest my developing skills were a little
bit rusty at the beginning of the module, we had our final project assignment: to remake one
of the first arcade games. After a long time thinking me and Marc decided to choose Space
Invaders (1978 version).
We started looking for the original sprites and, luckily for us, we managed to find the
complete sprite-sheet on Space Invaders fan sites.
Next step was the development of the game mechanics. In order to achieve our goal we started
analyzing the game by playing one of the many online flash remakes. After that, we started
planning a set of objects that represent the whole game. Below you can find a diagram of
the classes:
 Here is a brief explanation of the behaviour of each class:
-
Spaceship: this class manages the spaceship in the bottom part of the screen
(controlled by the player) by managing movements, controls, shooting bullet conditions,
collisions with enemies' bullets, player's lives and score.
-
Bullet:this class manages the bullet's behaviour and movements.
-
EnemyManager: this class manages the whole group of enemies, their movements, speed and
score value. It also manages whether or not an enemy can shoot a bullet and the
collisions between each enemy and the bullets shot by the spaceship.
-
Enemy: this is the simplest representation of an enemy and it provides the simple
functionalities required by the EnemyManager.
-
BonusEnemy: this class represents the UFO that flies at the very top of the screen
and if hit it provides a huge amount of points.
-
EnemyBullet: this class is almost identical to spaceship's Bullet with the only
difference of the used sprite and movement behaviour.
-
Shield: this class represents one of the green shields just on top of the spaceship and
it manages the collisions between spaceship's Bullet and EnemyBullet, deciding when a
single piece of it has been destroyed.
-
ShieldPart: this is the smallest part of the shield and it manages the amount of HP
(hit points) of a shield.
-
AnimationPlayer: this class provides a set of controls needed to manage a sprite
animation.
-
Animation: this class creates a sprite animation starting from a sprite sheet.
About the game menu we customized an example provided by Microsoft development website called
Game State Management.
To be honest one of the hardest parts of the project was merging our game mechanics classes
and the game menu example. First attempts were a disaster, but after a couple of days of
blood and tears we managed to master it.
If you want to have a look of what we have done, you can find a video of the game in action
in the link below:
Space Invaders - The Remake
While, if you have some programming skill or if you just want to know how to make a video game
in XNA in the link below you can find the source code of our project:
Space Invaders Source Code
In order to import it and work on it you will need:
All the software above is legally free to download from Microsoft website.
Next time I will talk about the Final Project, a brand new video game called Shards. Stay tuned!!!
September 26, 2012 | Categories: DIT, Game Engines, Images | Leave a comment
I'm sorry if I didn't post for a while but, the end last sprint for Game Production's
project and the end of the semester, took most of my time...
Anyway, let's continue and finish talking about the remake of Prince of Persia
(1989 version) in 2D.
In order to finish the development of the game features, we needed to develop two last but
tricky features: Prince's combat mechanics and enemies' AI.
After this task the last thing to do was develop more content. Luckily, we managed to find
the map of the first level of the original game and, since we had all the elements required
to create it, we developed and improved it by making it more difficult.

Below you can find the last 3 videos:
Prince of Persia - Build 6
Prince of Persia - Build 7
Prince of Persia - Build 8
While here you can find our last build.

At the end of this last development sprint our lecturer asked us to focus on the
advertisement of our game by asking to all of us to reach the target of at least 200 likes
on our Facebook page.
In order to do that we advertised our game by posting on Prince of Persia's social networks'
fan pages and forums, we also created Prince of Persia based memes.
Anyway, thanks to the mutual help all the groups of the class gave to each other and the
help provided by few indie game developers, we managed to reach 144 likes in the last month.

Next post will be about another remake, Space Invaders!!!
Stay tuned!!
May 19, 2012 | Categories: DIT, Game Production, Video | Leave a comment
After a while since the last post related to Game Production module I'm glad to announce the
open beta of our game.

During the last month we have internally released 3 new builds where we have completely
revamped the control system, developed the first level and added a lot of new features:
- New prince animations
- Threats (Spikes, Guillotines and Falling Tiles)
- Gates triggered by buttons
- End level gate
- Interactive objects (Good and Bad Potions, Swords)

Here you can find the videos of the last 3 builds:
Prince of Persia - Build 3
Prince of Persia - Build 4
Prince of Persia - Build 5

If you want to help us improving the gameplay experience join us as beta tester by downloading
our latest build and filling a survey about your experience.

You can find below the control list:
- Left/Right: Run left/right
- Up: Vertical Jump/Ledge Climb
- Down: Crouch
- Space: Standing Jump
- Left/Right + Space: Running Jump
- Left/Right + Shift: Creep/Walk
- Down + Left/Right: Crouch step
- Ctrl: interact with object

We are going to release new builds on a weekly base every Wednesday on our Facebook page
Prince of Persia 2D. Don't miss them out!!!
March 24, 2012 | Categories: DIT, Game Production, Video | Leave a comment
During the last four weeks me, Marc and Meghann spent most of our time thinking about the
Final Project idea proposal.
What we presented is a concept for a platform game called Shards, where a 13 years old boy has
to pursue the quest of waking his brother from a coma by collecting mirror shards spread all
over two parallel worlds, the normal world and the hallucinations' world created by the fervid
and split mind of our main character.

For more information about the story and the game features, please have a look at:
- game proposal
  Shards Idea Proposal
- preliminary presentation
  Shards - Presentation
- final presentation
  Shards 2nd presentation

Feel free to leave your opinion in a comment below.

See ya!
March 13, 2012 | Categories: DIT, Drawings, Final Project, Images | 1 Comment
I'm sorry if I disappeared for a while, but semester two has started and with it new module's
projects has to be done.
One of them is Game Production's module project. For this module we have to choose an old 80s
video-game and reproduce it using Game Maker 8.1.
After a brief meeting me, Marc and Sarah have decided to reproduce Prince of Persia (1989 ver.).
After a couple of crazy weeks fighting with Game Maker and a dozen of internal builds of the
game, we managed to produce a working vertical slice of the game reproducing most of the prince
movements in a small part of the first level.
Here you can find the videos of the first two released builds:
Prince of Persia - Build 1 (Vertical Slice)
Prince of Persia - Build 2
Stay tuned to have news about the next builds.
February 24, 2012 | Categories: DIT, Game Production, Video | Leave a comment
As last but bot least assignment of the 1st semester, me, Marc, Berhard and Ben had to produce
a Machinima using World of Warcraft as background set and recording tool.
After a brief brainstorming of what we had to do, we decided to record a music video.
In particular, Rammstein's Rosenrot (Rammstein - Rosenrot), because it suites perfectly the
medieval/fantasy theme of World of Warcraft.
So, we started studying the music video and we writing a detailed script of the list of scenes
we had to record.
After a whole day of recording session, we started to do the production process. It wasn't an
easy task as we thought, because matching the cut scenes with the rhythm of the song, means
that you have to count every fraction of second.
Anyway, after one day of production process we managed to export our final version of the video.
Here is what we have done so far: Rosenrot Machinima
January 31, 2012 | Categories: DIT, Ludology & Gameplay, Video | Tags: machinima, rosenrot rammstein, world of warcraft | Leave a comment
It's been a while since I've published something on this blog, but Christmas Break and the
closure of Semester 1 got me really busy...
This post is the sequel of Integrated Project - Phase 2, where me, Cara, Stephen, Shane
and Christopher worked together to analyze and develop more what we have done so far.
The feedback we received from our professors was really good, but, since we over-developed
our idea, we had to resize the scope of our project.
For this reason, after few meetings during the early days of January, we decided to focus
our analysis for Phase 3 mainly on the interaction between a Registered Customer and a
Fashion Designer. In particular, during an engagement for a tailored attire.
In order to achieve our goal we continued to follow User Center Design steps:
If you want to have a look at the work we have done so far, please visit our development
blog:
http://smashnfashion.tumblr.com
Here you can find our final presentation:
http://www.slideshare.net/fab1986/custom-closet-presentation-phase-3
January 27, 2012 | Categories: DIT, Integrated Project | Tags: custom closet, user experience design, wire frames | Leave a comment
It's been a while since I've published something on this blog, but I was working on
few projects at the same time...
One of them is the Phase 2 of the Integrated Project, where me, Cara, Stephen, Shane
and Christopher worked together to analyze and develop Cara's idea.
The idea is to create an e-commerce web application where fashion designers (well-known
and new to the industry) can show their designs and sell them to interested customers.
This is the idea presentation video:
http://www.youtube.com/watch?v=JdnX2RQK-xE
Following the User Center Design and Creativity, Innovation and Problem Solving techniques
we managed to analyze and develop the idea into something commercially competitive to the
big names.
The steps we have followed are:
-
Brand Design
-
Mind Maps
-
PMI (Positive, Minus, Interesting)
-
Internet Survey Analysis
-
Group Interview Analysis
-
User Roles & Personas Development
-
Requirements Gathering
-
Functional Specs Analysis
-
Use Case Scenarios & Business Logics Development
If you want to have a look at the work we have done so far, please visit our development
blog:
http://smashnfashion.tumblr.com
Here you can find our final presentation:
http://www.slideshare.net/fab1986/custom-closet-presentation-10575869

Stay tuned for more updates...
December 15, 2011 | Categories: DIT, Integrated Project | 1 Comment
After few weeks of hard work our (Marc, Bernhard & me) time management board game is near to be born.
It is called "Na Celtigh" which in irish gaelic means the celts. In this game the
player controls a celtic clan and, in order to survive three ages (Stone, Bronze and
Iron age), the player has to gather and trade resources with other players.
He/she has also to face positive and negative events that occur in his/her region.
The player that made the right trades and managed to take his/her clan to Iron Age wins.
If you want to learn more about it, please visit our development blog:
http://mfb2011.tumblr.com/
November 20, 2011 | Categories: Design Practice | 1 Comment
Ok here we are with another design Practice brief. After a lecture on typography
basics and how choosing the right font family for your composition can empathize
the message you want to pass on to the viewer.
My Design Practice lecturer decided to practice these new acquired skills and all
the previous ones creating a movie poster.
Brief requirements were:
- The movie has to be directed by Martin Scorsese, Alfred Hitchcock or Stanley
  Kubrick.
- The posters should be eye-catching, dramatic and must embody a strong concept
  that alludes or hints to the film narrative and mood.
- Poster Text must include: Title of film, name of director, cinema logo.
- And also information for the screening: showtime, a date in October, venue address,
  booking details.

Since I've seen all Stanley Kubrick's films I decided to choose one of them.
In particular 2001: A Space Odyssey.
Here is what I've done:

November 2, 2011 | Categories: Design Practice, DIT, Images | Leave a comment
One week ago, during Ludology lesson the lecturer analyzed a famous Nintendo
DS puzzle game: Professor Layton and the Curious Village.
The story is quite linear, the main character has to sort out a mystery
related to a strange village and to do that he has to gain the trust of
the villagers by solving their puzzles.
For this reason as my weekly brief  had to think about 10 different puzzles.
Here is what I've done:
http://www.slideshare.net/fab1986/10-puzzles-brief-with-solutions

Furthermore, during last monday lesson all students had been divided in 2
people groups and, after we played each other's puzzles, we had to create a
puzzle mini-game by putting together some of our puzzles and writing a
persuasive story.
All mini-games have to be created in 30 minutes.
Here is what me and Annmarie have done:
http://www.slideshare.net/fab1986/escape-from-the-cursed-temple-with-solutions
October 26, 2011 | Categories: DIT, Ludology & Gameplay | Leave a comment
It's been a while since I posted something, but I was really busy due to
the 1st Phase of Integrated Project.
During this phase all students are divided in groups of 3/4 people and
each person have to think about an idea for an innovative multimedia based
application.
Here is mine:
http://www.slideshare.net/fab1986/integrated-project-phase-1

If you want to tell me what do you think about it,
just leave me a comment below.
October 25, 2011 | Categories: DIT, Final Project | Leave a comment
My last brief for Design Practice was to create a logo for a hypothetical
iPhone/iPad app called Colour Code.
The brief was to create it in both versions: Full Color and Black & White.
My first attempt was trying to highlight colour concept creating a logo
that reminds wet paint dripping on a wall.
 While creating my second attempt I tried to give more strength to code
concept.
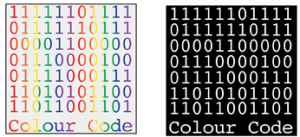 Design Practice lecturer liked pretty much my second attempt and she
suggested me few changes to do to make it more impressive.
Here is what I got:

October 17, 2011 | Categories: Design Practice, Images | Leave a comment
Last week's lesson of Ludology & Gameplay I learned that the fundamental
characteristics of a game are:
-
Reality representation.
-
Player Interaction.
-
Many type of Conflicts (e.g.: against time, other players, game
environment, player him/herself, etc.)
-
Safety
N.B.:
These characteristics aren't related to the game type and the way the game
is played.

Furthermore, behind every game conflict analysis there is always
a dominant strategy that leads the player to the best outcome.

Last week brief was to practice my game analysis skills and to make
a review of a free to play time management game.

I've chosen this one: Farmer 2: Save the village

And after I played the first 10 levels, here is my review: Game Review
October 11, 2011 | Categories: Ludology & Gameplay, Review | Leave a comment
During Design Practice 2nd lesson I learned colour theory and how colour can be
precisely identified by 4 standard rules:
RGB
RGB is the colour space for images shown on a screen. It is an additive colour
model and every colour in this space is identified by the quantity of the 3 base lights.
N.B.:
Value range is 0-255 an 8 bit number.

CMYK
CMYK is the colour space for printed images. It is a subtractive colour model
and every colour is identified by the percentage of colour used.

HTML Hex
HTML Hexadecimal number is a standard usually used in web pages design.
It is a string representing the RGB values converted in Hexadecimal.
It is quite used because with a 6 digit string it is possible to identify
a specific colour in RGB space.

Pantone Code
Pantone Code is a standard usually used in typography. It is an alphanumeric code
that represents a colour in CMYK space.

Another dictate of colour theory is that there are many ways to have a colour contrast.
They are explained by the 7 colour contrast laws:
-
Contrast of hue
-
Light-Dark contrast
-
Cold-Warm contrast
-
Complementary contrast
-
Simultaneous contrast
-
Contrast of saturation
-
Contrast of extension
This week brief was to produce a mood-board choosing a colour of interest,
identifying it in all four ways (RGB values, CMYK values, HEX Number, Pantone Code).
Use this colour in four of the seven contrast laws and look for evidence
of your colour in design, fashion, trends, etc.
And create your own palettes starting from your chosen colour.

Here is what I've done:

October 8, 2011 | Categories: Design Practice, Images | Leave a comment
In few hours I will my micro talk about 5 games ideas from my life experience.
If you want to have a look here is the presentation:
http://www.slideshare.net/fab1986/microtalk-5ideas-life
Wish me good luck... :P
October 3, 2011 | Categories: Ludology & Gameplay, Microtalk | Leave a comment
When I was a High School student I always wondered which were Game Designer's Tools...
Now I know the answer... :P

October 2, 2011 | Categories: Images, Ludology & Gameplay | 3 Comments
Here is a brief explanation of the behaviour of each class:
Black & White Version:
My strategy in designing the mockups is to use Logo's palette as main colour theme, and, at the same time, trying to keep a simple structure. After a long afternoon spent measuring in pixels the main parts of the website, I've drawn this basic layout:
After I've defined the basic structure of my pages it was time to put some fake content and here is what I've done: Home Page
Log In Feature
After Log In
Artists Page
Albums Page
About Page
Behind each page there is a common structure:
In order to recap the whole process below you can find the project Presentation attached to the final submission deliverables: http://www.slideshare.net/fab1986/sound-state-presentation
The Production of a mood-board
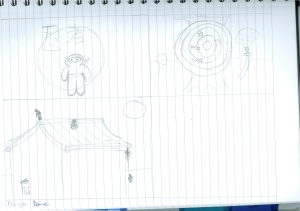
I've drawn some sketches


And few logo attempts


I finally produced my final version of the logo: Full Colour
Black & White
iPhone/iPad icon
Since the second part of this project is to produce mockups of the four core pages of Sound State's website, I had to modify and resize my images in order to fit web standards: Logo Web Version
Facebook Page logo
iPhone/iPad icon
Favicon
While creating my second attempt I tried to give more strength to code concept.
Design Practice lecturer liked pretty much my second attempt and she suggested me few changes to do to make it more impressive. Here is what I got:
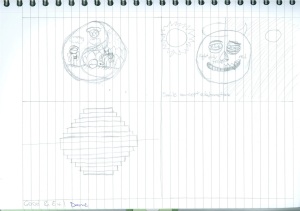
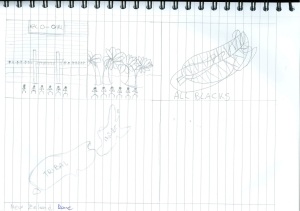
Design a series of thumbnails and/or sketches




Production of one or more final images


